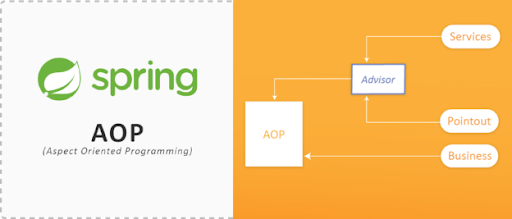
Sử dụng Spring AOP Advise trong Spring
Giới thiệu nội dung bài viết
Chào các em ,chủ để hôm nay chúng ta sẽ tìm hiểu về AOP Advise có ý nghĩa là gì nhé .
1. Spring AOP là gì
Anh lấy ví dụ như anh có một ứng dụng là Ví điện tử. Trong ứng dụng này anh có chức năng là thanh toán. Khi gọi chức năng thanh toán thì anh muốn in ra câu lệnh log lại hành động của anh, trước khi các dòng code thực hiện thanh toán và in ra log khi thanh toán thành công.
1
2
3
4
5
6
7
8
9
    public class Payment {

        public boolean isPaymentSuccess() {
            System.out.println("hàm payment được gọi");
            boolean isSuccess = mastercard.payment();
            System.out.println("hàm payment đã gọi thành công");
        }

    }
Như vậy các em thấy anh sử dụng hàm System.out.println trong hàm isPaymentSuccess để log lại các đoạn code đang chạy. Như vậy nó có 2 nhược điểm sau
- Thứ 1 giả sử như anh có 50 files giống như payment thì anh phải ghi 100 dòng system out.
- Thứ 2 như các em thấy hàm isPayment thì nên tập trung vào việc thanh toán không nên làm các việc như log. Như vậy là vi phạm nguyên tắc của lập trình một method chỉ nên làm một việc duy nhất.
- Thứ 3 sau này anh muốn sửa lại nội dung của log thì anh phải vào từng file để sửa.
Để khắc phục những nhược điểm này chúng ta sử dụng AOP. Chúng ta sẽ move tất cả log (system.out.println) ra một file riêng, trong method isPaymentSuccess chúng ta chỉ có những dòng code cho thanh toán không có hàm system.out.println và chúng ta sẽ sử dụng kỹ thuật nhúng log (system.out.println) vào method isPaymentSuccess bằng AOP. Như vậy chúng ta thấy rằng trong hàm isPaymentSuccess chỉ tập trung vào việc thanh toán không quan tâm tới việc log.
Trong làm dự án cũng vậy, anh chia dự án ra nhiều module như đăng ký, đăng nhập, thanh toán. Những module này chỉ làm nhiệm vụ của nó. Còn việc log lại thì anh viết một module riêng sau đó dùng AOP để nhúng vào các method cần ghi log. Như vậy nó giải quyết được vấn đề mỗi module làm 1 việc duy nhất, khi cần thay đổi gì về log anh chỉ cần vào module log mà sửa chứ không phải như cách 1 là vào tất cả các file trong dự án sửa lại.
2. Spring AOP Advise
Hôm nay chúng ta sẽ sử dụng Spring AOP Advise cho ví dụ của mình. Trong ví dụ hôm nay chúng ta sẽ viết một class là CustomerService có các phương thức là hiển thị name và url của khách hàng. Mình sẽ áp dụng AOP trong CustomerService. Nghĩa là trước khi hàm hiển thị name và url chạy thì mình sẽ ghi log nội dung trước khi hàm đó thực thi.
Trong AOP hỗ trợ cho chúng ta 4 laoij Advise
- MethodBeforeAdvice : Chạy trước khi method được chạy
- AfterReturningAdvice : Chạy sau khi method chạy xong
- After Throws Advise : Chạy sau khi method ném ra ngoại lệ
- Around Advice : Tổng hợp 3 cái advice ở trên thành 1.
3. Ví dụ khi chưa dùng AOP Advise
Ví dụ ta chạy lớp CustomerService khi chưa sử dụng AOP
Bước 1. Ta có lớp CustomerService như sau
1
2
3
4
5
6
7
8
9
10
11
12
13
14
15
16
17
18
19
20
21
22
23
24
25
public class CustomerService {
    private String name;
    private String url;

    public void setName(String name) {
        this.name = name;
    }

    public void setUrl(String url) {
        this.url = url;
    }

    public void printName() {
        System.out.println("Customer name : " + this.name);
    }

    public void printURL() {
        System.out.println("Customer website : " + this.url);
    }

    public void printThrowException() {
        throw new IllegalArgumentException();
    }

}
Bước 2. Ta cấu hình bean
1
2
3
4
5
6
7
8
9
10
11
<beans xmlns="http://www.springframework.org/schema/beans"
    xmlns:xsi="http://www.w3.org/2001/XMLSchema-instance"
    xsi:schemaLocation="http://www.springframework.org/schema/beans
    http://www.springframework.org/schema/beans/spring-beans-2.5.xsd">

    <bean id="customerService" class="com.levunguyen.CustomerService">
        <property name="name" value="Le Vu Nguyen" />
        <property name="url" value="https://levunguyen.com" />
    </bean>

</beans>
Bước 3. Chạy Chương trình
1
2
3
4
5
6
7
8
9
10
11
12
13
14
15
16
17
18
19
20
21
22
23
24
25
import org.springframework.context.ApplicationContext;
import org.springframework.context.support.ClassPathXmlApplicationContext;

import com.mkyong.customer.services.CustomerService;

public class App {
    public static void main(String[] args) {
        ApplicationContext appContext = new ClassPathXmlApplicationContext(
                new String[] { "Spring-Customer.xml" });

        CustomerService cust = (CustomerService) appContext.getBean("customerService");

        System.out.println("*************************");
        cust.printName();
        System.out.println("*************************");
        cust.printURL();
        System.out.println("*************************");
        try {
            cust.printThrowException();
        } catch (Exception e) {

        }

    }
}
Khi chạy chương trình chúng ta nhận được kết quả sau
1
2
3
4
5
*************************
Customer name : Le Vu Nguyen
*************************
Customer website : https://levunguyen.com
*************************
4. Sử dụng Before Advise
Bây giờ ta mong muốn trước khi phương thức printName và printURL chạy thì ta ghi log lại trước khi các hàm đó thực thi. Chúng ta sẽ implements MethodBeforeAdvice để làm việc này,
- Bước 1. Tạo lớp HackBeforeMethod như sau
1
2
3
4
5
6
7
8
9
10
11
import java.lang.reflect.Method;
import org.springframework.aop.MethodBeforeAdvice;

public class HackBeforeMethod implements MethodBeforeAdvice
{
    @Override
    public void before(Method method, Object[] args, Object target)
        throws Throwable {
            System.out.println("HackBeforeMethod : Before method hack!");
    }
}
- Bước 2 : cấu hình bean HackBeforeMethod để hack vào phương thức printName và printURL trước khi các hàm này chạy
1
2
3
4
5
6
7
8
9
10
11
12
13
14
15
16
17
18
19
20
21
22
23
24
<beans xmlns="http://www.springframework.org/schema/beans"
    xmlns:xsi="http://www.w3.org/2001/XMLSchema-instance"
    xsi:schemaLocation="http://www.springframework.org/schema/beans
        http://www.springframework.org/schema/beans/spring-beans-2.5.xsd">

    <bean id="customerService" class="com.mkyong.customer.services.CustomerService">
        <property name="name" value="Le Vu Nguyen" />
        <property name="url" value="https://levunguyen.com" />
    </bean>

    <bean id="hackBeforeMethodBean" class="com.levunguyen.HackBeforeMethod" />

    <bean id="customerServiceProxy"
                 class="org.springframework.aop.framework.ProxyFactoryBean">

        <property name="target" ref="customerService" />

        <property name="interceptorNames">
            <list>
                <value>hackBeforeMethodBean</value>
            </list>
        </property>
    </bean>
</beans>
- Chúng ta tạo bean customer service
1
2
3
4
 <bean id="customerService" class="com.levunguyen.CustomerService">
        <property name="name" value="Le Vu Nguyen" />
        <property name="url" value="https://levunguyen.com" />
</bean>
- Tiếp đến ta tạo bean hackBeforeMethodBean
1
<bean id="hackBeforeMethodBean" class="com.levunguyen.HackBeforeMethod" />
- Tiếp đến ta tạo bean proxy bọc bên ngoài customerService, customerServiceProxy dùng để hook vào customerService bean này là của spring cung cấp bởi org.springframework.aop.framework.ProxyFactoryBean.
Ta chỉ ra target bean cần hook vào là gì trong trường hợp này ta dùng bean customerService
Ta chỉ ra interceptorNames là bean hackBeforeMethodBean
Để sử dụng Spring Proxy ProxyFactoryBean ta phải thêm thư viện cglib vào file pom
1
2
3
4
5
<dependency>
    <groupId>cglib</groupId>
    <artifactId>cglib</artifactId>
    <version>2.2.2</version>
</dependency>
- Bước 3 chạy test chương trình
1
2
3
4
5
6
7
8
9
10
11
12
13
14
15
16
17
18
19
20
21
22
23
24
25
import org.springframework.context.ApplicationContext;
import org.springframework.context.support.ClassPathXmlApplicationContext;
import com.mkyong.customer.services.CustomerService;

public class App {
    public static void main(String[] args) {
        ApplicationContext appContext = new ClassPathXmlApplicationContext(
                new String[] { "Spring-Customer.xml" });

        CustomerService cust =
                                (CustomerService) appContext.getBean("customerServiceProxy");

        System.out.println("*************************");
        cust.printName();
        System.out.println("*************************");
        cust.printURL();
        System.out.println("*************************");
        try {
            cust.printThrowException();
        } catch (Exception e) {

        }

    }
}
Ta sẽ nhận được kết quả là
1
2
3
4
5
6
7
8
*************************
HackBeforeMethod : Before method hacked!
Customer name : Le Vu Nguyen
*************************
HackBeforeMethod : Before method hacked!
Customer website : https://levunguyen.com
*************************
HackBeforeMethod : Before method hacked!
Như vậy ta thấy thông tin log Before method hacked! được in ra trước khi phương thức printName và printURL được gọi
5. Sử dụng After Advise
Được sử dụng khi phương thức printName và printURL chạy xong. Chúng ta implements interface AfterReturningAdvice
Bước 1 : tạo HackAfterMethod
1
2
3
4
5
6
7
8
9
10
11
12
13
import org.springframework.aop.ThrowsAdvice;

import java.lang.reflect.Method;
import org.springframework.aop.AfterReturningAdvice;

public class HackAfterMethod implements AfterReturningAdvice
{
    @Override
    public void afterReturning(Object returnValue, Method method,
        Object[] args, Object target) throws Throwable {
            System.out.println("HijackAfterMethod : After method hacked!");
    }
}
Bước 2 : cấu hình bean và proxy
1
2
3
4
5
6
7
8
9
10
11
12
13
14
15
16
17
18
19
20
21
22
23
24
<beans xmlns="http://www.springframework.org/schema/beans"
    xmlns:xsi="http://www.w3.org/2001/XMLSchema-instance"
    xsi:schemaLocation="http://www.springframework.org/schema/beans
        http://www.springframework.org/schema/beans/spring-beans-2.5.xsd">

    <bean id="customerService" class="com.mkyong.customer.services.CustomerService">
        <property name="name" value="Le Vu Nguyen" />
        <property name="url" value="https://levunguyen.com" />
    </bean>

    <bean id="hackAfterMethodBean" class="com.levunguyen.HackAfterMethod" />

    <bean id="customerServiceProxy"
                class="org.springframework.aop.framework.ProxyFactoryBean">

        <property name="target" ref="customerService" />

        <property name="interceptorNames">
            <list>
                <value>hackAfterMethodBean</value>
            </list>
        </property>
    </bean>
</beans>
Bước 3 : Chạy test ta sẽ nhận kết quả sau
1
2
3
4
5
6
7
*************************
Customer name : Le Vu Nguyen
HijackAfterMethod : After method hacked!
*************************
Customer website : https://levunguyen.com
HackAfterMethod : After method hacked!
*************************
Dòng lệnh log ra câu After method hacked! sẽ được in ra sau khi hàm printName và printURL chạy xong.
5. Sử dụng After throwing Advise
Nó được sử dụng sau khi phương thức ném ra ngoại lệ trong ví dụ trên ta thấy hàm printThrowException sẽ ném ngoại lệ.
Bước 1 : tạo class HackThrowException implements interface ThrowsAdvice
1
2
3
4
5
6
7
import org.springframework.aop.ThrowsAdvice;

public class HijackThrowException implements ThrowsAdvice {
    public void afterThrowing(IllegalArgumentException e) throws Throwable {
        System.out.println("HackThrowException : Throw exception hacked!");
    }
}
Bước 2 : cấu hình bean
1
2
3
4
5
6
7
8
9
10
11
12
13
14
15
16
17
18
19
20
21
22
23
24
<beans xmlns="http://www.springframework.org/schema/beans"
    xmlns:xsi="http://www.w3.org/2001/XMLSchema-instance"
    xsi:schemaLocation="http://www.springframework.org/schema/beans
        http://www.springframework.org/schema/beans/spring-beans-2.5.xsd">

    <bean id="customerService" class="com.mkyong.customer.services.CustomerService">
        <property name="name" value="Yong Mook Kim" />
        <property name="url" value="http://www.mkyong.com" />
    </bean>

    <bean id="hackThrowExceptionBean" class="com.levunguyen.HackThrowException" />

    <bean id="customerServiceProxy"
                 class="org.springframework.aop.framework.ProxyFactoryBean">

        <property name="target" ref="customerService" />

        <property name="interceptorNames">
            <list>
                <value>hackThrowExceptionBean</value>
            </list>
        </property>
    </bean>
</beans>
- Bước 3 : Chạy lại chương trình ta sẽ nhận được
1
2
3
4
5
6
*************************
Customer name : Le Vu Nguyen
*************************
Customer website : https://levunguyen.com
*************************
HackThrowException : Throw exception hacked!
Chúng ta thấy thông báo Throw exception hacked! khi mình gọi hàm printThrowException
6. Sử dụng Around Advise
Chúng ta sử dụng Around Advise để kết hợp 3 loại advice ở trên trong cùng một nơi. Thông thường thì mình làm như vậy.
- Bước 1. Chúng ta tạo file tên HackAroundMethod và implement interface MethodInterceptor
1
2
3
4
5
6
7
8
9
10
11
12
13
14
15
16
17
18
19
20
21
22
23
24
25
26
27
28
29
30
31
32
33
import java.util.Arrays;

import org.aopalliance.intercept.MethodInterceptor;
import org.aopalliance.intercept.MethodInvocation;

public class HijackAroundMethod implements MethodInterceptor {
    @Override
    public Object invoke(MethodInvocation methodInvocation) throws Throwable {

        System.out.println("Method name : "
                + methodInvocation.getMethod().getName());
        System.out.println("Method arguments : "
                + Arrays.toString(methodInvocation.getArguments()));

        // same with MethodBeforeAdvice
        System.out.println("HijackAroundMethod : Before method hacked!");

        try {
            // proceed to original method call
            Object result = methodInvocation.proceed();

            // same with AfterReturningAdvice
            System.out.println("HijackAroundMethod : Before after hacked!");

            return result;

        } catch (IllegalArgumentException e) {
            // same with ThrowsAdvice
            System.out.println("HijackAroundMethod : Throw exception hacked!");
            throw e;
        }
    }
}
- Bước 2. Cấu hình bean
1
2
3
4
5
6
7
8
9
10
11
12
13
14
15
16
17
18
19
20
21
22
23
24
<beans xmlns="http://www.springframework.org/schema/beans"
    xmlns:xsi="http://www.w3.org/2001/XMLSchema-instance"
    xsi:schemaLocation="http://www.springframework.org/schema/beans
        http://www.springframework.org/schema/beans/spring-beans-2.5.xsd">

    <bean id="customerService" class="com.levunguyen.CustomerService">
        <property name="name" value="Le Vu Nguyen" />
        <property name="url" value="https://levunguyen.com" />
    </bean>

    <bean id="hijackAroundMethodBean" class="com.levunguyen.HackAroundMethod" />

    <bean id="customerServiceProxy"
                class="org.springframework.aop.framework.ProxyFactoryBean">

        <property name="target" ref="customerService" />

        <property name="interceptorNames">
            <list>
                <value>hijackAroundMethodBean</value>
            </list>
        </property>
    </bean>
</beans>
- Chạy Test chúng ta sẽ nhận được
1
2
3
4
5
6
7
8
9
10
11
12
13
14
15
16
17
*************************
Method name : printName
Method arguments : []
HijackAroundMethod : Before method hacked!
Customer name : Le Vu Nguyen
HijackAroundMethod : Before after hacked!
*************************
Method name : printURL
Method arguments : []
HijackAroundMethod : Before method hacked!
Customer website : https://levunguyen.com
HijackAroundMethod : Before after hacked!
*************************
Method name : printThrowException
Method arguments : []
HijackAroundMethod : Before method hacked!
HijackAroundMethod : Throw exception hacked!
Trên đây là anh hướng dẫn nguyên lý của Spring AOP cho mọi người nắm thông qua cấu hình XML. Hiện nay thì các dự án của anh không dùng XML nữa mà thay vào đó là dùng annotation @Aspect , @Before , @After như cấu hình dưới đây. Mọi người nên sử dụng nó trong các dự án của SpringBoot. Anh sẽ viết một bài về SpringBoot AOP sau này. Mục đích hôm nay anh muốn mọi người hiểu và cách hoạt động của AOP là như thế nào.
Trong spring boot thì mình bật chức năng đó lên như sau
1
2
3
4
5
@Configuration
@EnableAspectJAutoProxy
public class AopConfiguration {
    ...
}
1
2
3
4
5
6
7
8
9
10
11
12
13
14
15
@Component
@Aspect
public class LoggingAspect {

    private Logger logger = Logger.getLogger(LoggingAspect.class.getName());

    @Pointcut("@target(org.springframework.stereotype.Repository)")
    public void repositoryMethods() {};

    @Before("repositoryMethods()")
    public void logMethodCall(JoinPoint jp) {
        String methodName = jp.getSignature().getName();
        logger.info("Before " + methodName);
    }
}
1
2
3
4
5
6
7
8
9
10
11
12
13
14
15
16
17
18
19
20
21
22
23
24
25
@Component
@Aspect
public class PublishingAspect {

    private ApplicationEventPublisher eventPublisher;

    @Autowired
    public void setEventPublisher(ApplicationEventPublisher eventPublisher) {
        this.eventPublisher = eventPublisher;
    }

    @Pointcut("@target(org.springframework.stereotype.Repository)")
    public void repositoryMethods() {}

    @Pointcut("execution(* *..create*(Long,..))")
    public void firstLongParamMethods() {}

    @Pointcut("repositoryMethods() && firstLongParamMethods()")
    public void entityCreationMethods() {}

    @AfterReturning(value = "entityCreationMethods()", returning = "entity")
    public void logMethodCall(JoinPoint jp, Object entity) throws Throwable {
        eventPublisher.publishEvent(new FooCreationEvent(entity));
    }
}

Mọi người hãy Subscribe kênh youtube dưới đây nhé để cập nhật các video mới nhất về kỹ thuật và kỹ năng mềm
Các khoá học lập trình MIỄN PHÍ tại đây
Comments